A comprehensive guide to fighting Sans, the final boss of the Genocide/No Mercy route.
Sans Undertale.
The ultimate test of any True Undertale Gamer.
Sands Thundersnail is quite the challenge, especially if you don't know what to expect, nor how the fight even works.
That's where this guide comes in.
Below, I will explain the mechanics of Sadge Trogdorfail's fight, which strategies work and which don't, and show all of his attacks.
This guide limits spoilers for the remainder of the No Mercy route, but it does have a section related to Speedrunning, found at the bottom of the page.
The following sub-sections will be organized by their relevance to the average player.
Chives Mustardkale has only 1 HP, 1 ATK, and 1 DEF, so he would normally be a very easy enemy.
To make up for this, he bends the rules of the game to get an advantage:
Some other important notes:
Given Franz Ferdinand's STATs and unique mechanics, ATK and DEF are useless against him - DF doesn't reduce the damage you take, and AT doesn't affect the turn length of the battle.
With that, the only weapons and armor that affect the battle are ones that give special effects, those being:
Finally, using both the Torn Notebook and Cloudy Glasses at the same time reduces damage even further (preventing roughly ~1/9 of damage taken), and slows the rate at which KARMA is converted to damage.
Given all of that, which should you choose?
Well, given that the Cloudy Glasses are the only armor item that actually do anything against Cans, you should always be using them.
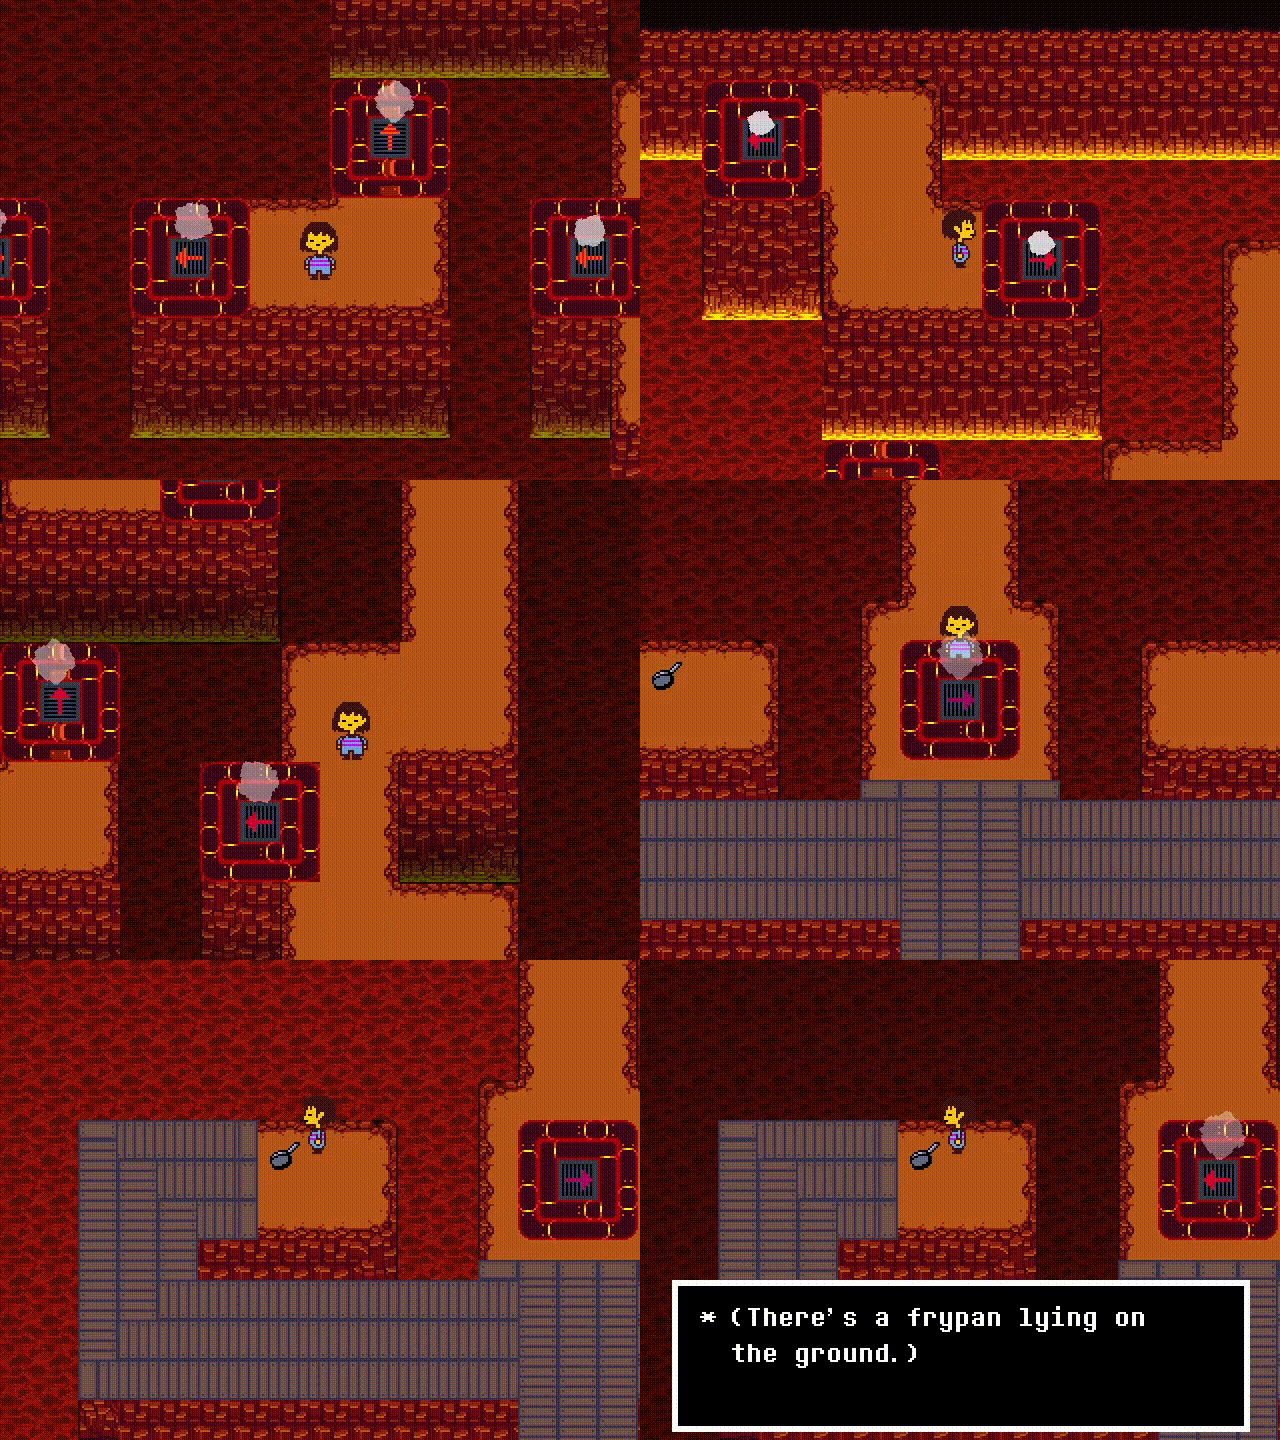
As for the weapon, most say that the Burnt Pan is the best, but they're likely unaware of the effect that INV has during the fight.
The other useful weapon to use is the Torn Notebook, which effectively gives you more defense, while also slowing the rate at which KARMA drains your HP.
Either choice is valid, but I would suggest the Torn Notebook:
The extra ~25-30 HP you'll get via the Burnt Pan is probably not much more than the HP you'll save by taking less damage, if at all. Plus, healing loses you a turn, and in my experience, most people beat Pan's Worsethanbook with a consumable or two left in their inventory anyway.
Speaking of...
In the MTT Resort, one can buy Legendary Heroes, which heal 40 HP.
With that, the only relevant consumables are ones that heal more than 40 HP, or have special effects:
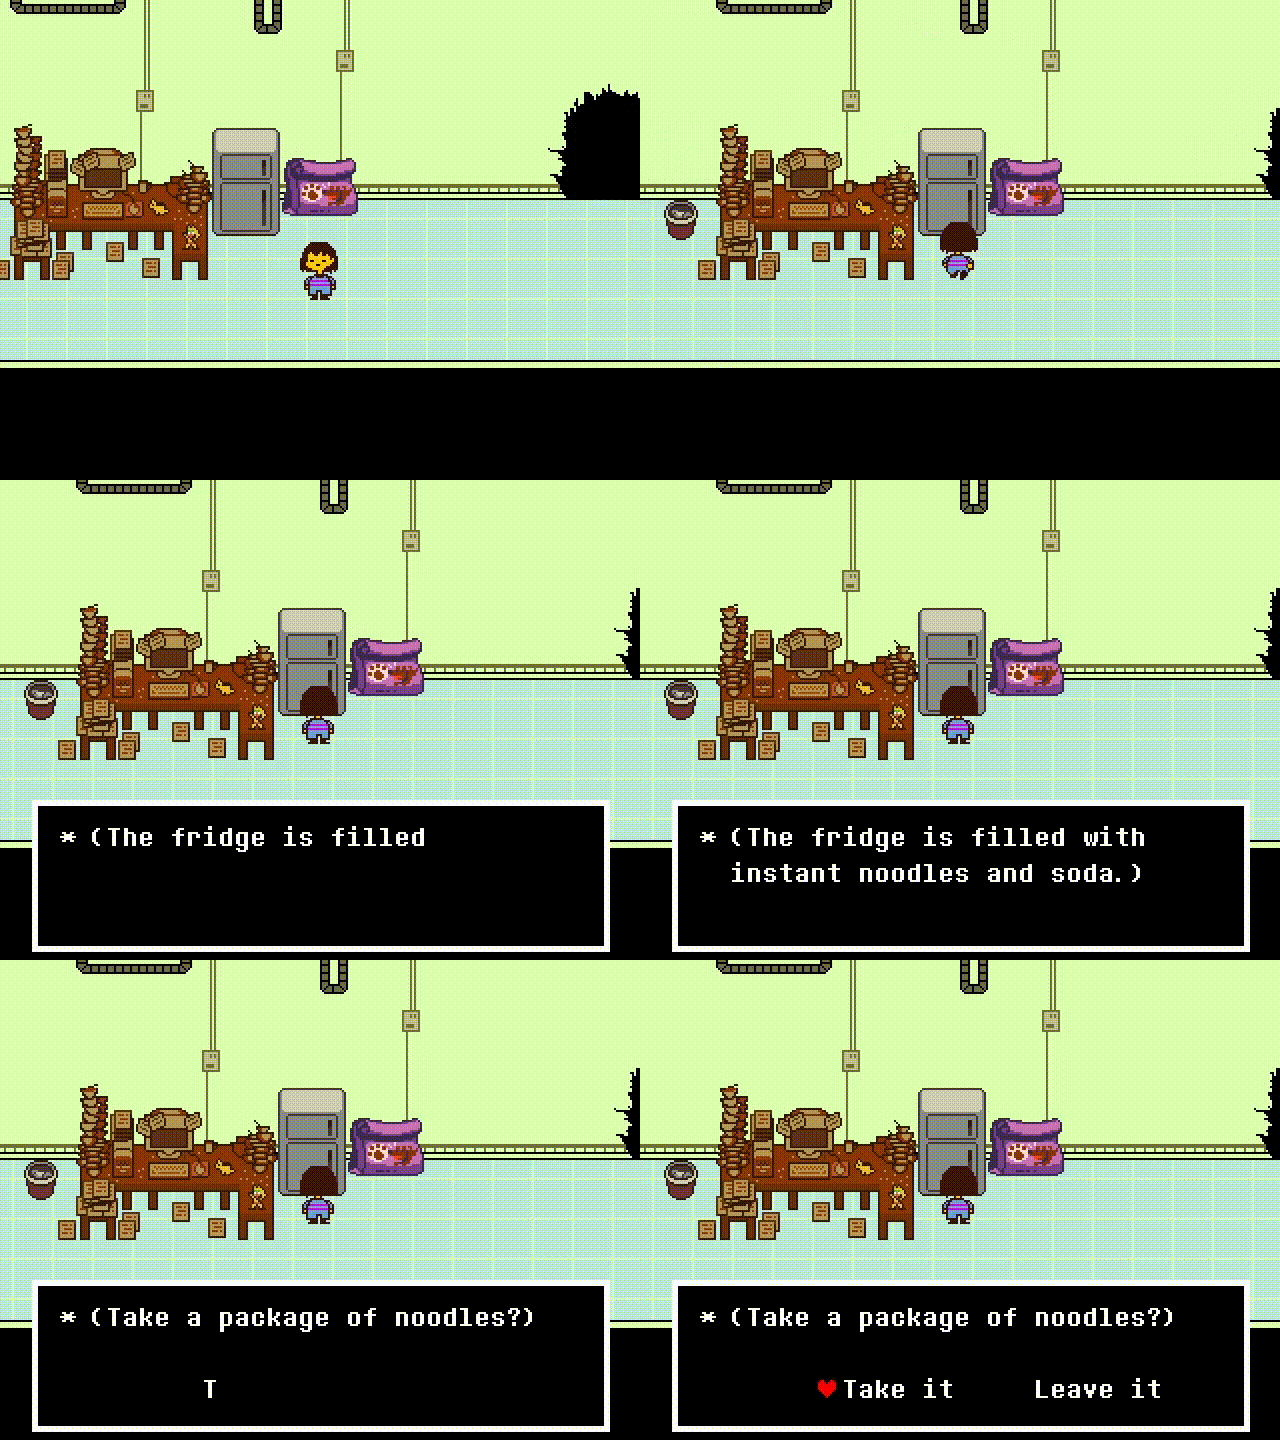
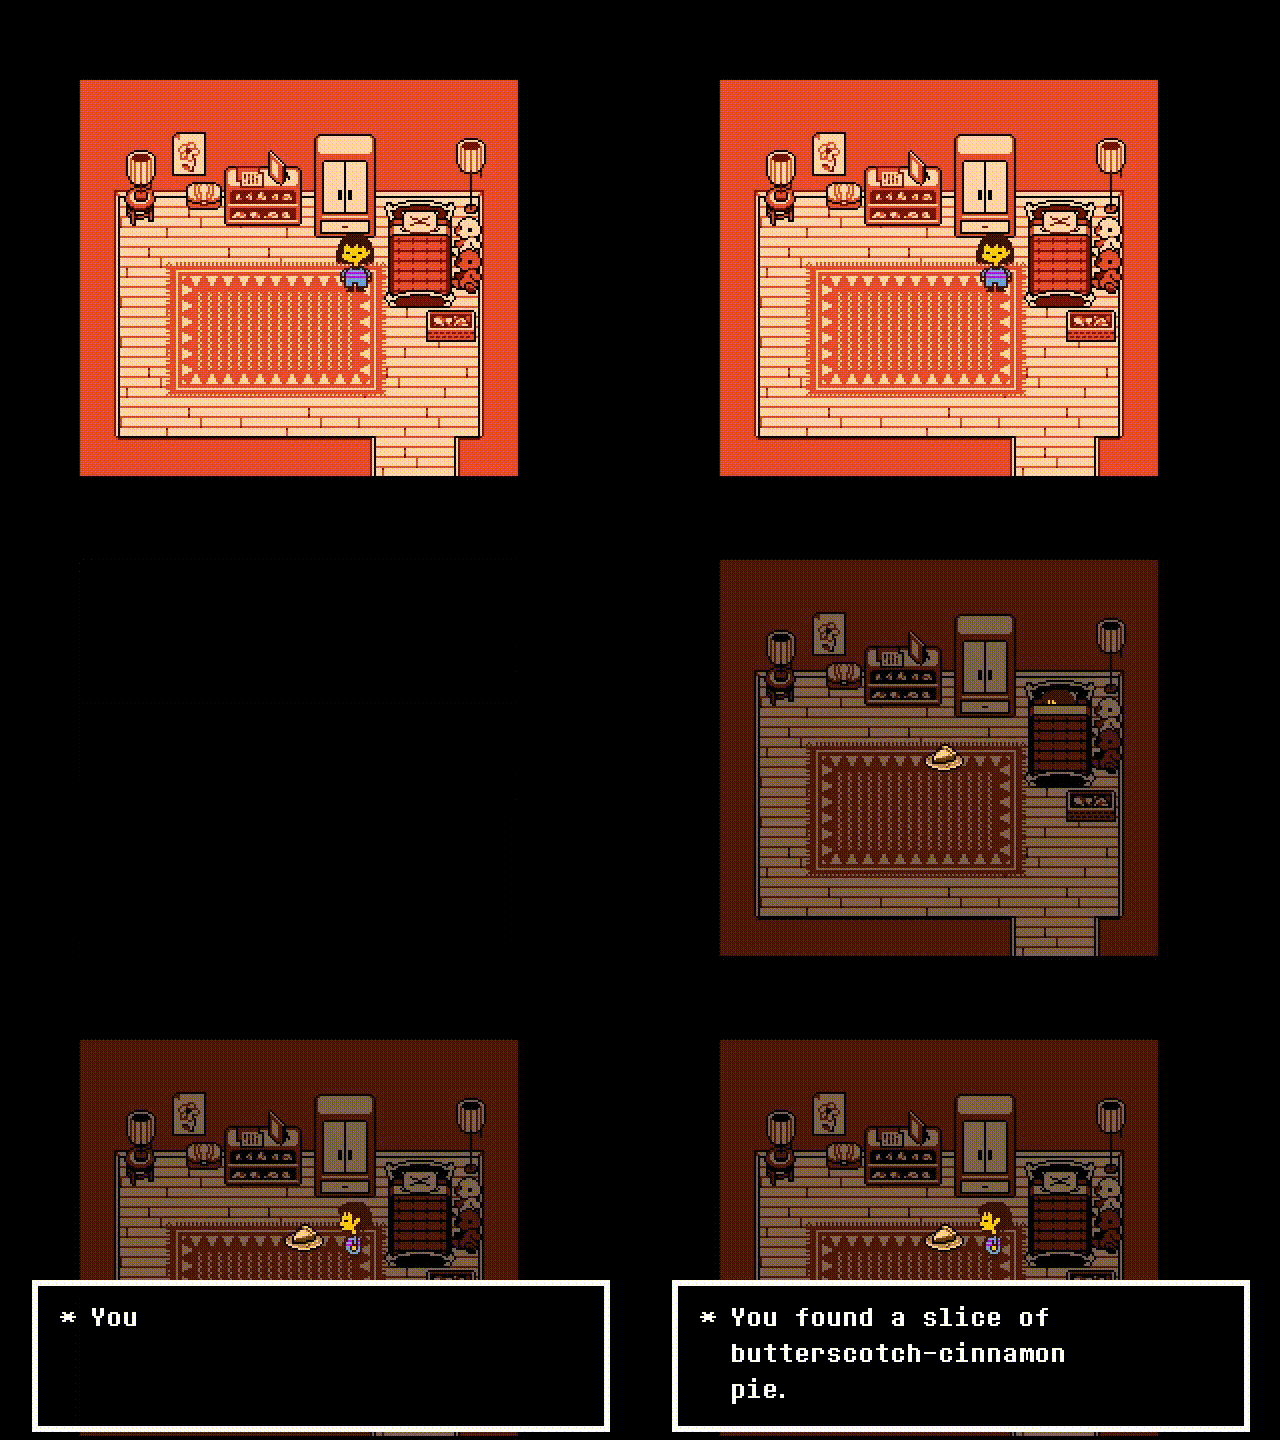
Provided you haven't used the Pie, Instant Noodles, or Snowman Pieces, you should have three spaces open for Legendary Heroes and/or Sea Tea.
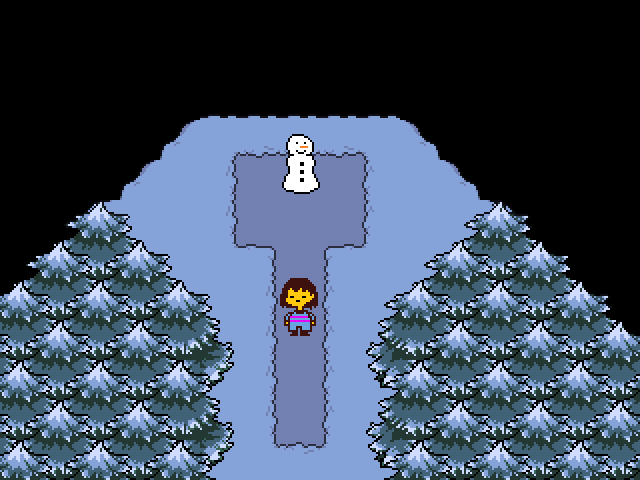
If you've already used the Snowman Pieces, don't worry - having at most 15 less HP to work with isn't a big deal.
If you've already used the Pie or Instant Noodles, may The Angel have mercy on your SOUL.
As for the remaining spaces in your inventory, just fill them up with Legendary Heroes.
Trading a Legendary Hero for a Sea Tea to get the SPEED bonus is often recommended, as it can be a lifesaver for his harder attacks.
I'd say two Sea Teas is too much however, as sacrificing 30 HP for diminishing returns really isn't worth it.
Arright. This is what you've been waiting for.
There's quite a high demand for guides for these attacks, as this is by far the most difficult fight in the game.
You can even find a whole online simulator for this!
Of course, that so-called 'bad time simulator' is just a simulator - it doesn't show you the Pro Gamer Strats!
and also the emulation is terrible oh my god why is it like that
Anyway, here's all of Stan Millvale's, and strategies for each!
Seven Granddad's opening attack.
I recommend using only Up and Down for this entire attack; using Left and Right is unnecessary, and will only make dodging it more complicated.
First, he does a Gravity Slam towards the bottom of the Bullet Board.
Simply hold up as soon as the attack starts to dodge it, making sure to do a full jump.
He then creates a Bone Hallway for you to squeeze through. At this point, you'll probably already be in position to dodge this if you dodged the last part properly.
After this, Sam Jaundice summons several sets of Gaster Blasters, creating safe spots for you to dodge them:
[Gravity Slam and Bone Hallway: 6 Innate KR]
[Gaster Blasters: 10 Innate KR]
A seemingly simple Blue SOUL Mode attack that is actually pretty dang hard to dodge.
Sets of vertical bones will shoot towards the center of the Bullet Board, forcing you to jump between the small gaps.
Again, I recommend only using Up and Down for this attack. Pressing Left or Right will severely screw with the timing, making the attack nigh impossible to dodge.
[6 Innate KR]
One of Anne's only Blue Attacks.
This one is quite hard to dodge, especially if you don't know how to do it to begin with.
There's only a small window of time to jump over the small white bone after the blue bone passes you, and the next blue bone forces you to make as small a jump as possible.
This attack is made much easier by moving with the bones as you jump, giving you just enough time to land before the next blue bone movement-checks you.
Importantly, after the third small white bone, the attack switches directions; after jumping over the third white bone, start shifting to the right to give yourself more time to react to the set coming from the left.
[6 Innate KR]
A variation of the Small Hops attack.
In this attack, the gaps are all random distances from the ground, requiring more reaction speed, and (slightly) less precision.
This attack can be pretty hard if you don't have it down, but muscle memory will eventually take hold, allowing you to know exactly how long to hold Up for.
[6 Innate KR]
Woohoo!
Platforming!
In this attack, the ground quickly becomes covered in bones, requiring you to jump on the moving platforms hovering above.
This is simple at first, but the third platform has bones jutting out from the ceiling above.
You'll have to maneuver around them by coming in at a sharper angle.
After the third platform comes and goes, the 'Bone Ocean' will start to disappear. Quickly jump down to the clear ground before a single large bone blocks the path.
[6 Innate KR]
The continuation of the last attack.
It's mostly the same at first, albeit headed in the opposite direction.
The big difference comes in with a large extra bone with a platform above, sitting in between the first and second platforms.
You can jump onto the high platform if you want, but you can also just jump all the way to the next one, making the attack quite a bit simpler.
Next comes three platforms with bones above them, like the third platform from the previous attack.
Like last time, you'll have to come in at a sharper angle so you don't get hit by the bones above.
Thankfully, getting to the second platform only requires moving off the edge of the first - you'll land right on it, without having to do an otherwise tricky jump.
After a small hop to the third and fourth of these platforms, a large bone will come from the right, forcing you to squeeze above it, landing on the clear ground below.
You'll have to wait for the perfect moment, as the ceiling prohibits a larger jump, and the time you have is limited by another large bone coming from the left.
[6 Innate KR]
This ends up being one of Shams' hardest attacks due to its random nature.
Sets of platforms come in two rows, dividing the play field into three rows for you to stand in.
In the top and bottom rows, bones come from the right, while the middle row has bones coming from the left.
These bones sweep across the entire row, forcing you to vacate to one of the surrounding rows.
I recommend disregarding the top row entirely. You can avoid the entire attack by just moving between the bottom two rows.
Once you've exited the bottom row, try getting back to it as soon as the coast is clear. Doing this will save you the trouble and brainpower of having to deal with the moving platforms.
Note the movement pattern here - stay in one row, moving with the bones, until you're forced to move to the other row, switching directions. You'll notice this ends up making a big circle pattern. Recognizing this will come in handy for later attacks.
One extra tip: when moving in the opposite direction of a platform you're standing on, your movement speed is severely limited.
Try doing very small hops in the direction you're moving in order to not get dragged away by the platform's movement.
[6 Innate KR]
In this attack, you'll start on a single moving platform above a 'Bone Ocean'.
This joyride is interrupted by three columns of bones that force you to weave between the gaps.
If you know the attack well, you'll know when to jump and when to sit in place on the platform, but, since I know you, I'll save you the trouble and tell you outright.
When moving to the right, jump to pass through the gaps of the first column, coming to a rest on the left side of the platform.
Then, move to the right side of the platform to pass through the second bone column and cruise through the third.
Then, once you're past the third column, line yourself up with the right side of the platform.
Lining it up right isn't as precise as you might expect, and you can push against the right wall of the Bullet Board help with this.
Doing this, you'll simply cruise back through the bones, no problem.
Notably, this attack is timed such that once you're back in between the left and middle columns, you can simply do a full jump directly upwards to run out the clock, saving you the trouble of dodging the left column again.
[Vertical Looping Bones: 5 Innate KR]
['Bone Ocean': 6 Innate KR]
The same as the Sliding Platforms attack, but with Gaster Blasters instead of bones.
The same tips apply:
You can get by with only using the bottom two rows, alternating between them as you're about to get blasted, and sticking to the bottom row.
If you're on the middle row and are about to be hit, do a very small jump to get yourself off the platform, before falling down to the bottom row.
However, unlike the Sliding Platforms attack, it may be prudent to avoid landing on the platforms at all: you only need to be out of the bottom row the instant the Gaster Blaster goes off, so a single jump is often enough to get you out of the way.
[10 Innate KR]
A continuation of the Platform Hops attack, with the left and right columns having tighter gaps for you to squeeze through.
Again, here's the strats:
To dodge the left column, do a full jump, catching the gap as it's high in the air.
Dodge the middle column by staying on the left side of the platform.
Dodge the right column the same way as the left: by doing a jump, catching the gap as you're in the air.
On the return trip, line yourself up with the right side of the platform, but once you're close to the right column, quickly race to the other side to get through the small gap.
Afterwards, simply line yourself up with the left side of the platform, allowing you to cruise through the middle column and run out the clock by jumping straight up again.
[Vertical Looping Bones: 5 Innate KR]
['Bone Ocean': 6 Innate KR]
The Small Hops attack again, but quite a bit faster.
Unfortunately, there's not much advice to give aside from 'git gud'.
[6 Innate KR]
Now we get back to that circle motion I mentioned earlier.
In this attack, large bones above move to the left, while small bones below move to the right.
Stay on the ground, moving to the right with the small bones, before doing a full jump to the left, moving with the big bones. You may need to shift a little bit to the side so you don't hit a small bone as you're falling back down.
Rinse and repeat.
Depending on how full your jumps are, you'll either clear the entire thing with only two jumps, or you may need to do an extra one or two.
Try to limit the amount of jumps you have to do, whilst also being safe.
For me, the sweet spot is doing two mostly full jumps, and then doing an extra small jump over two small bones at the end.
[6 Innate KR]
A continuation of the Random Hops attack from earlier.
Provided you've attacked him every single turn since the beginning of the fight, this is the last attack you'll see before the halfway point.
Like Small Hops 2, there's not much advice I can give aside from 'git gud'.
[6 Innate KR]
A faster version of the Blaster Platforms attack.
The same advice as last time still applies.
Notably, you won't see this attack at all unless you've used a turn to ACT, heal, or SPARE.
[10 Innate KR]
From here until you attack him for the 13th time, Jevil Deltarune reuses his attacks, randomly choosing from one of these four:
Small Hops 2, Horizontal Bone Slide, Random Hops 2, and Faster Blaster Platforms.
Anyway, this here's the halfway point - if you want to duck out to avoid spoilers for the rest of the fight, this is a great place to stop.
Once you've attacked Raisin Brans 13 times, he'll SPARE you.
For as long as he's sparing you, ACTing and using ITEMs does not progress the fight, nor cause him to attack.
Use this time to take a breather and heal if necessary - it amounts to a free turn.
I recommend using the worst healing items you have, as you can use multiple in a row with no consequence.
To progress the fight, just start attacking again.
This is where this guide gets (even more) complicated.
Occasionally, Ness Earthbound will perform a set of multiple small attacks, randomly selected from a pool, comprised mostly of shorter versions of Lucas Motherthree's other attacks.
This first set has five attacks, and appears just after attacking Sandy Cheeks once he SPAREs you.
For all of the following 'Mini Attacks', only move up and down unless specified. It's easy to accidently move left or right when you shouldn't, which is very dangerous and hard to recover from.
In this attack, bones will quickly rush towards you from both sides, with a bunch of bones covering the floor, and followed by large bones stretching from the floor to the ceiling.
To dodge it, you must jump directly upwards over the approaching floor bones.
[6 Innate KR]
In this attack, you start on the far side of the Bullet Board, with a mountain of bones rushing towards you.
(it looks like this; I couldn't figure out how to describe it)
-> [,,,,,||||| ]
To jump over the large bones, do a full jump, and once you're above them, move sideways directly towards them to fully clear them.
After jumping over the large bones, don't worry about clearing the small bones; the clock will run out before you fall into them.
[6 Innate KR]
Very similar to the first 'Mini Attack', except it's preceeded by two large blue bones, forcing you to wait for them to pass before jumping over the small bones.
[6 Innate KR]
A mini version of the Small Hops attack.
Do note you only have to jump through two gaps before the attack ends.
[6 Innate KR]
A mini version of the Random Hops attack.
You only need to jump through two gaps before the attack ends.
[6 Innate KR]
Once Yams Pumpkinale SPAREs you, any further attacks will be met with retaliation in the menu!
First, there'll be a single bone, repeatedly jumping over where your soul will be when you select an option.
Something important to note is that while these menu bones can damage you and inflict KR, they can't actually kill you.
Obviously, try to avoid them if you can, but if you're already at 1 HP, you don't need to worry.
In fact, you might want to take the opportunity to learn the pattern or take a breather while you can - such opportunities are rare in this half of the fight.
Additionally, the top menu bones deal only 1 KR per frame, but only if you're above 60 HP (KR-inflicted HP included).
To avoid the first menu bones, wait until the bone passes over and heads back to the left, before quickly selecting the options.
To attack, simply press the confirm button again as soon as possible (hint: on a keyboard, both Z and Enter function as the Confirm key - you can press one with one hand and then press the other with your other hand).
If you're healing, you can simply select the first option like above, or quickly menu to the next item.
A faster version of the Gaster Blasters attack.
Like the last one, it -
Wait, what do you mean it appears before the second one?
[...]
That doesn't make sense, this one's way harder!
[...]
Okay, whatever you say.
If you couldn't tell from my hilarious bit, this attack is actually harder than its 'upgraded' version.
You'll start in the middle of a large Bullet Board while small, fast Gaster Blasters randomly appear and shoot towards you, forcing you to dodge them similar to Undyne the Undying's Random Spears attack.
This attack is probably Hands Brotherkill's hardest attack aside from his Finale attack, and requires experience, skill, and a bit of luck.
I recommend dodging it by making a large circle motion around the edges of the Bullet Board, making sure to change direction or wait when doing otherwise would get you killed.
[10 Innate KR]
The second volley of 'Mini Attacks'.
It's slightly faster than the first volley, and features a different set of five 'Mini Attacks':
A part of the Intro attack, turned into its own 'Mini Attack'.
You'll start at one side of the Bullet Board, and must navigate an oncoming Bone Hallway, making a curving motion.
Like usual, don't move left or right. Moving up and down is more than sufficient to dodge it, and moving left or right can complicate things.
[6 Innate KR]
Four Gaster Blasters will suddenly appear, making a + (cross) shape, forcing you to the corners of the Bullet Board.
You need to move sideways during this one, but be sure to stay still before the attacks ends - you don't want to accidentally move during the next attack!
[10 Innate KR]
The same as the last attack, except it makes an X shape, forcing you to one of the walls of the Bullet Board. You can NOT move sideways during this attack. It's prohibited and felonious.
[10 Innate KR]
A miniature version of the Horizontal Bone Slide attack.
It's the same as the full version, but it ends before a second jump is necessary.
Do note that it can face either direction, forcing you to react to its orientation.
[6 Innate KR]
The hardest mini attack, bar none. You start on top of the upper of two platforms, above a 'Bone Ocean'. A bone comes towards you from either the left or right, forcing you off of the upper platform and onto the one below.
While that happens, a second bone is headed from the opposite direction towards the lower platform, forcing you to jump off of that platform as well.
Like the Bone Slide attacks, the key is to make a circle motion - move off of the upper platform, then turn back to land on the lower platform, jumping off of it as soon as possible.
Do note that you don't have to jump off of the top platform. It's easier to just slide off without jumping.
Note that once you jump from the lower platform you're safe, as the attack will end before you fall below; there's no need to try to land back on the upper platform.
[6 Innate KR]
After the third time you attack after Shads Killerwhale SPAREs you, you'll be met with bones on the bottom options of the menu, sweeping over them.
These bones have an alternating pattern, where the first and third buttons are covered, then the second and fourth buttons are covered, repeat.
It's sorta like the Bone Slide attacks - stay on one until you can't, then switch to another.
Once you've selected an option though, you're safe. You can duck into the FIGHT, ACT, or ITEM menus if you need a breather, before heading back out into the great unknown.
Do note that, unlike any other of Fat Skeleton's attacks, the bottom menu bones do not inflict any KR at all.
In my opinion, this attack and its upgraded versions are Smear Campaign's hardest attack.
You'll be thrown towards a wall of the Bullet Board, and upon landing a set of bones will come out of the wall you were thrown into, forcing you to quickly react and jump out of the way.
It's already very difficult to react to, and in later iterations of the attack a full jump is required, further diverting your attention.
Of course, you'll only have to deal with that if you don't do the Pro Gamer Strats!
The super secret trick that trivializes the attack is as follows:
hold all four arrow keys at the same time.
Yeah, that's literally it.
It's basically free.
Of course, if you're some sort of PLEBIAN and use a controller or a keyboard that doesn't accept that many inputs at once, you're gonna have to suck it up and dodge it the normal way.
Regardless of how you dodge it though, do note that there are 9 Gravity Slams per attack, and that once it's over, you'll have to start dodging menu bones again.
[6 Innate KR]
Same as above, except a bit faster.
[6 Innate KR]
Unfortunately, this is where taking a breather becomes taking a beating.
After he SPAREs you and you've attacked him five times, you'll be met with a combination of the previous sets of menu bones for the rest of the fight.
You'll have to swap between menu buttons and quickly select your choice to avoid all of them.
Here's my strategy:
The second you enter the menu, switch to the ACT button.
Then, once the menu bones over the FIGHT and ITEM buttons are gone, switch to the one you want to use, and wait for the top bone to pass by.
Then, quickly press confirm twice to attack, or menu to the ITEM you want to use.
An, erm, easier version of the Faster Blasters attack.
It's probably supposed to be harder because of the increased size of the blasters, but their size doesn't matter as much as their speed in this instance.
Regardless, the increased size is considerable, and it's still a tough attack, especially if you get cornered.
Once again, I recommend making big circle motions.
[10 Innate KR]
In this attack, the Bullet Board is divided vertically into two halves, with bones on the right sweeping upward, and bones on the left sweeping downward.
As was probably revealed by what I called this attack, it's actually just a vertical version of the previous Bone Slide attacks.
With that, dodge it using the same circle motion you've been using all this time.
Move up with the right-hand bones for a little, then switch and move down with the left-hand bones.
You can make the circle motion as big as you feel comfortable with, but I recommend a very small one, as shown above in the video.
[6 Innate KR]
The third volley of 'Mini Attacks'.
This time, it's even faster, has 6 attacks, and includes all ten 'Mini Attacks'. It doesn't introduce any new ones, though.
Another set of Gravity Slams.
It's the same as Gravity Slam 2, except the bones are taller, requiring a more precise jump.
Provided you've been attacking every turn, this is the very last attack you'll see before the 'Finale'.
[6 Innate KR]
From here until you attack him for the 23rd time, Suds Rentalane reuses his attacks, randomly choosing from one of these three:
Gravity Slam 3, Mini Attacks 3, and Gaster Blasters.
Without practice, this is by far LAN Connection's hardest attack, as it's a conglomeration of numerous difficult attacks, thrown at you at breakneck speed.
If you're really feeling stuck on this one, it's not a bad idea to use that 'Bad Time Simulator' I mentioned earlier.
It's much more managable with practice and when knowing what to expect.
First up is a set of four Gravity Slams, all in random directions.
Even if you're using the cheese strat, you should still be prepared to quickly set up for the next attack.
Next up is a short vertical Bone Slide, which can be tricky to dodge depending on which wall you were last slammed into.
Next, you're thrown against the left wall, and then jettisoned down an elongated Bullet Board.
As you're flying to the right, you'll first encounter a curved Bone Hallway, dodged just as the others, by waving back and forth as it comes at you.
Next, the 'Turbo Tunnel' appears.
Sets of bones appear that block portions of the Bullet Board, requiring you to dodge up and down just like the Bone Hallway, albeit with much more precise timing.
For both of these, if you're on a keyboard, I recommend switching to moving up and down with two fingers and alternating with them, as opposed to moving your middle finger between the arrow keys every time.
Finally (for now), bones will start closing in from the top and bottom, forcing you to center yourself.
You may have noticed that the bones in the Bone Hallway are spaced out.
This can be used to your advantage; by holding right to immediately jump off of the left wall after the Vertical Bone Slide, you'll be positioned to fit in between the gaps, effectively nullifying that portion of the attack:
Of course (unlike in the video), you'll need to make sure you're in position to dodge the 'Turbo Tunnel'.
Anyway, once you hit the right side of the Bullet Board, you'll have to jump away to dodge the Gravity Slam bones that come out of the right wall.
Note that simply holding Left the entire time will cause you to fall back into the bones; You'll have to wait a little bit to avoid damage.
After that, you're repeatedly teleported to various Bullet Boards, with indicators warning you of upcoming Bone Stabs (like Gravity Slams but skipping straight to having to jump).
For the first one, jump directly upwards.
For the second one, jump down and to the right.
For the third one, jump up and to the left.
For the fourth and final one, jump down and to the right.
After that, get into position to play Ring Around the Rosy with a ring of Gaster Blasters.
Gaster Blasters sequentially appear in a counter-clockwise ring shape, making a sort of spinning middle bar that damages you.
You'll have to move in a tight counter-clockwise circle, running away from the newer Gaster Blasters, and towards the older ones.
Try to make as tight of a circle as possible without getting hit, and rack up that TP!
Oh, right.
Wrong game.
[Gravity Slams, Bone Slide, Bone Hallway, Turbo Tunnel, and Bone Stabs: 6 Innate KR]
[Gaster Blaster Ring: 10 Innate KR]
Anyway, once you've outlasted the Gaster Blaster Ring, you're free to go.
At this point, Quote Cavestory uses his Special Attack, that being slamming you against the walls, and then doing nothing until you give up.
Do note that the wall slams can't actually kill you. If you're on 1 HP, they won't do any damage.
After that, you'll have to figure out how to deal with his Special Attack!
What?
No, I'm not gonna tell you how to do it.
Figure it out on your own, dummy.
...
Okay, fine.
Here's the answer:
(?)
(Wait until he falls asleep, and then push the Bullet Board to the left, and then down onto the FIGHT button)
If you're anything like me, discovering the niche specifics of random things in Undertale is a highly enjoyable experience, not to mention a vaguely useful one from a theorycrafting/speedrunning perspective.
This section will cover INV and KARMA in detail, explaining the intricacies of things that only the most brain-rotten of Undertale fans would care for.
Your INV STAT represents how long you're invincible after taking damage.
Your INV starts at 30 (1 second of invincibility), but you can get some more by equipping the Torn Notebook or Cloudy Glasses, bought from Gerson's shop in Waterfall.
The in-game descriptions of the Torn Notebook and Cloudy Glasses say they give 6 and 9 INV respectively, but upon equipping them, you'll notice that they clearly increase your INV STAT by much more than just 15 (1/2 of a second).
So... what's up with that?
Well, to put it bluntly, the statistics the game gives you are blatently false, and have literally nothing to do with the actual INV STAT.
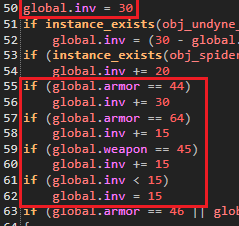
Diving into the code, we can confirm the
Torn Notebook
(Shown as
global.weapon == 45
in the image below)
actually gives you an extra 15 INV, while the
Cloudy Glasses
(Shown as
global.armor == 44
in the image below)
give you an extra 30 INV.
Together, they provide 45 INV, giving you a total of 75 INV, or 2.5 seconds of invincibility after taking damage.
(gml_Object_obj_battlecontroller_Step_0)
(?)
As an aside, this code reveals that INV is always kept at a minimum of 15 (despite this being impossible to see in-game).
It also reveals that INV works differently against Undyne the Undying and Muffet, the latter of which relates to the lore of the Purple SOUL.
(gml_Object_obj_sansb_body_Draw_0)
This is the code that's largely responsible for how INV works against Grains Andtheseeds. It's a little more complicated than the last one, but here's how I think it works:
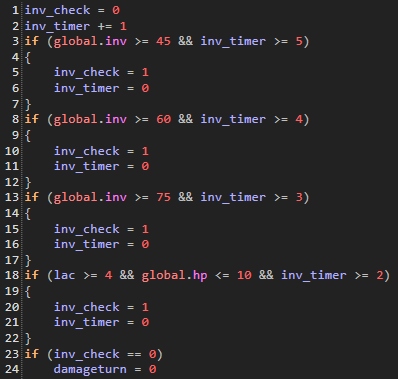
inv_timer (which starts at 0) is increased by 1 every frame.
If you don't have increased INV, then this doesn't do anything - you never get any i-frames.
If you do, though, then you'll be given one frame of invincibility every time the counter reaches a certain number, dependent on your INV:
Effectively, you're immune to Direct Damage (not KARMA) 1/5 of the time when using the Torn Notebook, 1/4 of the time when wearing the Cloudy Glasses, and 1/3 of the time when using both the Torn Notebook and the Cloudy Glasses.
When you're first hit by an attack, you'll be hit for 1 DMG and accrue a sizeable amount of KARMA, dependent on the attack's
Innate KR.
How much any given attack has is shown in the Attacks section.
Afterwards, for as long as you're in contact with the attack, you'll take an additional 1 DMG and 1 KR per frame, for a total of 30 Direct Damage and 30 KARMA per second.
(?)
For example, let's say you're hit by an attack that has 6 Innate KR, and are in contact with the attack for a third of a second (10 frames).
On the first frame, you'll be hit for 1 DMG and accrue 6 KR.
You'll then take another 1 DMG and 1 KR on each of the following 9 frames, for a total of 9 DMG and 9 KR.
Overall, you'll take 25 DMG: 10 from Direct Damage, and 15 from KARMA.
When you have KR, it is slowly converted to damage at a 1 KR:1 DMG ratio.
Like this, obviously:
(gml_Object_obj_sansb_body_Draw_0)
This code is even more complicated, but here's how my smooth brain interprets it:
Your KARMA is capped at 40, and then to 1 less than your current HP; you can't have more than 40 KR, nor more KR than HP.
If you have some amount of KR and aren't dead, km_t (henceforth 'KARMA Timer') increases by 1 every frame.
Depending on your current KR, the KARMA Timer is compared to one of several time limits. Once it meets that time limit, you'll take 1 Damage, lose 1 KR, and the KARMA Timer will be set back to 0.
40+ KR: 1 frame for KR to tick down (30 KR per second)
With the KARMA Timer Bonus: 2 frames (15 KR per second)
30-39 KR: 2 frames for KR to tick down (15 KR per second)
With the KARMA Timer Bonus: 4 frames (7.5 KR per second)
20-29 KR: 5 frames for KR to tick down (6 KR per second)
With the KARMA Timer Bonus: 8 frames (3.75 KR per second)
10-19 KR: 15 frames for KR to tick down (2 KR per second)
With the KARMA Timer Bonus: 20 frames (1.5 KR per second)
0-9 KR: 30 frames for KR to tick down (1 KR per second)
With the KARMA Timer Bonus: 40 frames (0.75 KR per second)
In short, and as mentioned earlier, KARMA drains faster as you have more of it, and slower as you have more INV.
Not only is it super complicated, but it's also bugged!
Looking at the code again:
(gml_Object_obj_sansb_body_Draw_0)
The code you see here is from the first part of Trans Cringefail's in-battle
Draw Event.
In GameMaker Language (GML), a Draw Event is how an object represents ('draws') itself on-screen.
If it seems strange that this code is inside of a Draw Event instead of a Step Event (the gameplay counterpart to Draw Events), then you'd be right.
I have no idea why Toby Fox made it this way.
As Draw Events are run every frame, the code that governs the KARMA Timer is run every 1/30th of a second. This would be fine on its own, if it weren't for the fact that the code that sets the KARMA Timer Bonus is also run every frame.
This means that while you have only one INV-boosting item equipped (I.e, you have 45 or 60 INV), km_bonus is randomly set to either 0 or 1 30 times per second.
You may have realized the problem.
If km_bonus is randomized each frame, then the variables that depend on it (such as the time limit that km_t needs to reach) will also be random each frame.
Given that km_t only needs to be above the time limit for a single frame, these random fluctuations are more than enough to cause KARMA to tick down and reset the timer.
The code is supposed to mean that, when you equip only one INV-boosting item, whether any given point of KARMA takes longer to tick down is random.
What ends up actually happening is that, once the KARMA Timer passes the minimum time limit, (That being the time limit if you weren't using any INV-boosting items) there's a chance for KARMA to tick down each frame until the maximum time limit (That being the time limit if you were using both INV-boosting items) is reached.
Ultimately, wearing only one INV-boosting item barely affects the rate at which KARMA is converted to damage.
Various fun facts and extraneae regarding the fight:
In the Genocide category of Undertale, Sans Deltarune functions as the final skill-check between you and your (hypothetical) PB.
Of course, you'll have the Ballet Shoes and Bandage equipped, unless you've equipped another armor for safety.
Three things are important to get a good fight:
Equip the Ballet Shoes:
The Burnt Pan or Torn Notebook may be tempting, but the amount of time you lose to the longer attack animations isn't really worth it.
Plus, if you need either of those to be safe during the fight, you should probably put in a bit more practice - you should be very confident in fighting Clash of Clans before running Geno.
Don't waste any turns doing anything other than attacking:
Aside from when he SPAREs you, healing will waste a turn, which is a lot of time to lose, especially against Hans Olo.
Of course, if you absolutely need to heal, it's better to do so than die. Do recall that after you heal, the cursor will still be on the ITEM option. Try not to heal again, or worse, reequip the Burnt Pan.
MASH:
The attack minigame and the battle dialogue can be mashed, as neither are important to the fight. The opening and ending monologues aren't mashable though, so don't bother; just press Z.
Do note that as battle dialogue, Some Dumbass' monologue can be mashed at 30 TBPS.
See Also: My Guide to Undyne the Undying (Speedrunning Section)
And that concludes this overly long and comprehensive guide to defeating Sans Undertail.
I hope this guide helps with the fight, and that you learned something new about the complicated inner-workings of the battle mechanics.
Thanks for reading!